dissabte, 19 d’octubre del 2013

DIY: Knot necklace


[ENG] I've been seeing this type of necklaces during the summer but I never bought one because I thought it shouldn't be that difficult to make, and I was right, although it takes quite a lot of time to make it. I did some research on the internet and I found a video explaining how to do it here and a post here.
You will need: 

  • 5 metres of rope
  • Metal clasps for necklaces
  • Superglue
  • Pins
  • Printed A4 pattern 
  • Porexpan
Step 1. Cut two strips of 2,5 meters; fix the pattern to the porexpan using some cellotape.
Step 2. The two lines from the patterns should be done separately. Pick one  and put your cord there (pay attention on how the cord goes (over or under) following the pattern and holding it with pins.
Step 3. One you finish one cord (check it is ok), you may start with the other one. Take you time....
Step 4. Remove all pins.
Step 5. Strech the cord from its ends and the centre until strengthened enough.
Step 6. Cut the cord to the size you need and glue the metal clasps at the ends.
[CAT] He estat veient aquests collarets per tot arreu durant aquest passat estiu, però mai me'l vaig acabar comprant perquè pensava que no hauria de ser gens difícil (ni car!!!), i tenia tota la raó, tot i que porta bastanta feineta. Després de buscar per internet vaig trobar un vídeo aquí i un post aquí.
Necessitareu:
  • 5 metres de corda
  • Tanques metàl·liques 
  • Superglue
  • Agulles
  • patró en A4
  • Porexpan
Pas 1. Talla dues tires de 2,5 metres; fixa el patró al damunt del porexpan amb cel·lo.
Pas 2. Les dues línees del patró s'han de fer per etapes. Escull-ne una i comença a resseguir la silueta amb la corda (en compte de veure si la corda va per sobre o per sota) i fixa-ho amb agulles.
Pas 3. Quan acabis amb la primera corda, segueix amb la segona. No vulguis córrer...
Pas 4. Treu les agulles.
Pas 5. Estira les cordes per les puntes fins que estigui prou apretat.
Pas 6. Talla la corda a la mida que vulguis i posa-hi les tanques amb superglue.


The pattern!

dissabte, 12 d’octubre del 2013

Pleased to Meet You: Kate Davies


[ENG] It's been a looooong time since the last Pleased to Meet You but today I bring you something I
discovered a long ago but as you see, I'm a little busy lately and I'm not posting that much...She is Kate Davies from Scotland and knits lovely stuff and the best is that you can buy her patterns is you are interested....
She describes herself as a person who enjoys designing knitwear (yes, she does!). Lucky us!
I really want to improve my knitting skills, because I'm in love with almost all her patterns.
You can buy her patterns here.

[CAT] Fa moltíssim temps des de l'últim Pleased to Meet You però avui us duc algo que crec que us agradarà i que fa temps que tinc, però com últimament he anat una mica liada doncs no he pogut publicar tant com voldria... Ella és Kate Davies, una noia escocesa que fa preciositats amb punt i el millor és que pots comprar els seus patrons per fer les teves peces.
Ella es descriu com a una persona que li agrada dissenyar roba de punt (i tant que li agrada!!). Afortunades nosaltres!
Realment tinc ganes de millorar les meves habilitats amb el punt, perquè m'agraden pràcticament tots els patrons que té.
Podeu comprar els seus patrons aquí.


sixareenfulllength

diumenge, 6 d’octubre del 2013

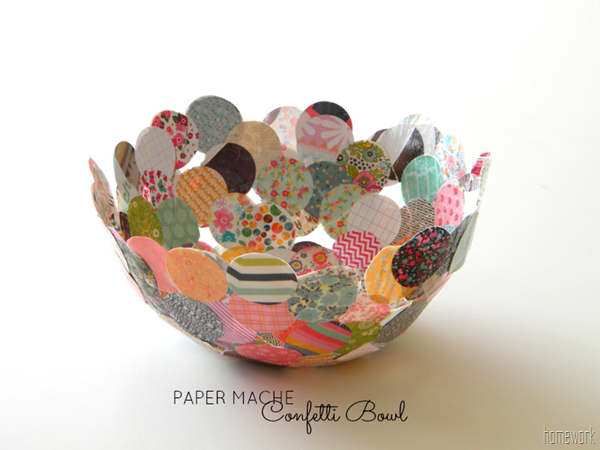
DIY: Paper Mache Confetti Bowl

Confetti Bowl 7
[ENG] You don't know what to do with those bits of paper you have left around the house but you are sure you don't want to throw them away?
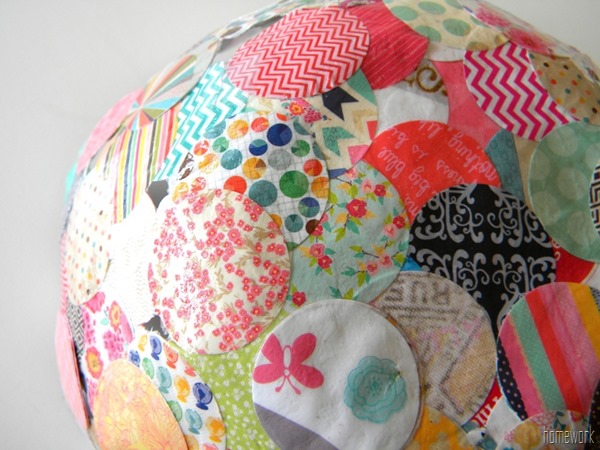
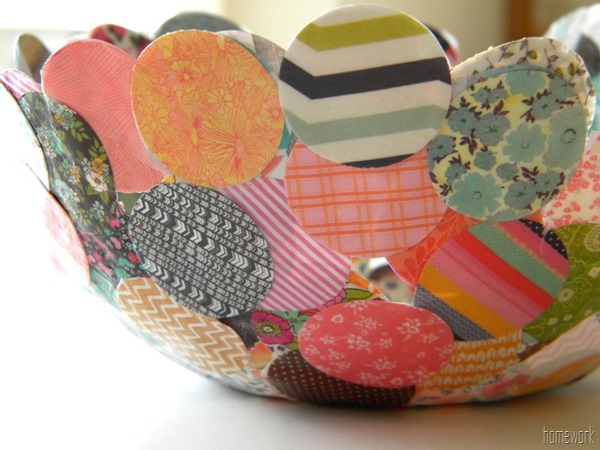
Then there is a solution for that, and I just found it at Homework blog...a nice paper maché confetti bowl.

To make a confetti bowl, you'll need:

  • Paper scraps
  • 1 circle punch
  • paper maché paste (just wait, I'll explain the recipe now)
  • varnish

To prepare the paper maché paste: 
  • combine 0.5 cup flour and 2 cups cold water in a bowl.
  • Boil 2 cups of water in a sauce pan and add the flour and cold water mixture. Bring to boil again.
  • Remove from heat and add 3 tablespoons of sugar.
  • Let cool. The paste will thicken as it cools.

  • Once the paste is cool enough to work with, start adding your paper, you can use a round vase covered with plastic wrap to have the shape. Use a brush or even your fingers, it's cool!!!
  • Keep covering until happy with the shape. Once the paper maché is dry (several hours), carefully remove it from the form by gently peeling the plastic wrap away from the form.
  • To finish the confetti bowl, just give it two coats of varnish.
[CAT] No saps què fer amb aquells trocets de paper preciosos que et queden desperdigats per casa i tens clar que no els vols llançar? Doncs la solució és fàcil, i l'he trobada al blog Homework, fer un bol de paper maché amb confetti!!!

Per fer-lo necessitaràs:

  • Retalls de paper
  • 1 perforadora rodona ( que fagi confetti de mida prou raonable...)
  • pasta de paper maché (ara us dic com fer-la)
  • vernís

Per fer la pasta de paper maché:

  • barreja 0,5 tasses de farina amb 2 d'aigua freda a un bol.
  • vull 2 tasses d'aigua i afegeix la barreja anterior. Torna a bullir.
  • Treu del foc i afegeix 3 cullerades de sucre.
  • deixa refredar. La pasta agafarà consistència mentre refreda.

  • Un cop la pasta és prou freda, comença a forrar un vol rodó, prèviament protegit amb film de plàstic, amb els trocets de paper i la pasta (fes servir un pinzell o els dits, que no passa res!).
  • Ves cobrint fins que consideris que ja té la forma i la pinta que t'agrada. Quan el paper maché sigui sec (unes quantes hores després...), separa-ho lentament del film de plàstic.
  • Per acabar dona-li un parell de passades de vernís perquè quedi més protegit.
  • I au!


Related Posts Plugin for WordPress, Blogger...

Google Analytics